In this article, we'll show you how you can connect your Thinkific account to Hoppy Copy via Zapier. Doing so will allow you to add new users, users who just completed their courses, and users who signed up for free previews as contacts in Hoppy Copy.
Things you'll need for this integration:
- Zapier account
- Hoppy Copy's API Key
- Thinkific account
Connecting your Thinkific account and Hoppy Copy
Step 1. Connect your Hoppy Copy account and Zapier
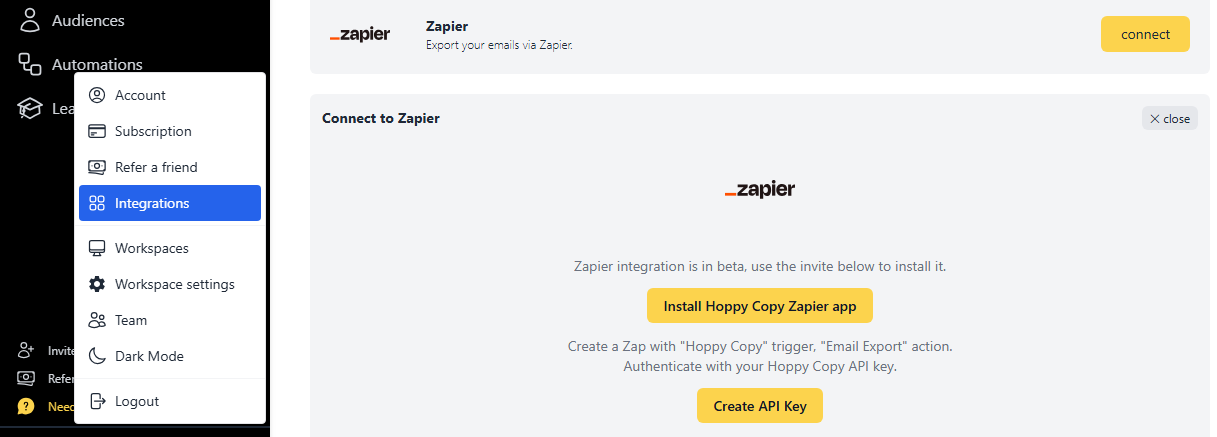
- Navigate to Account Settings -> Integrations
- Find the "Connect to Zapier" option and open it

After that, click Install Hoppy Copy Zapier app, and accept the Zapier invite to add the Hoppy Copy app to your Zapier account.
Then, generate an API key for the integration.
Step 2. Once the integration is set up, you can create a new Zap, select Thinkific as the trigger, and connect your Thinkific account. In this example, we want to add new users as new contacts in Hoppy Copy. Therefore, we need to choose 'New User' as the trigger event.
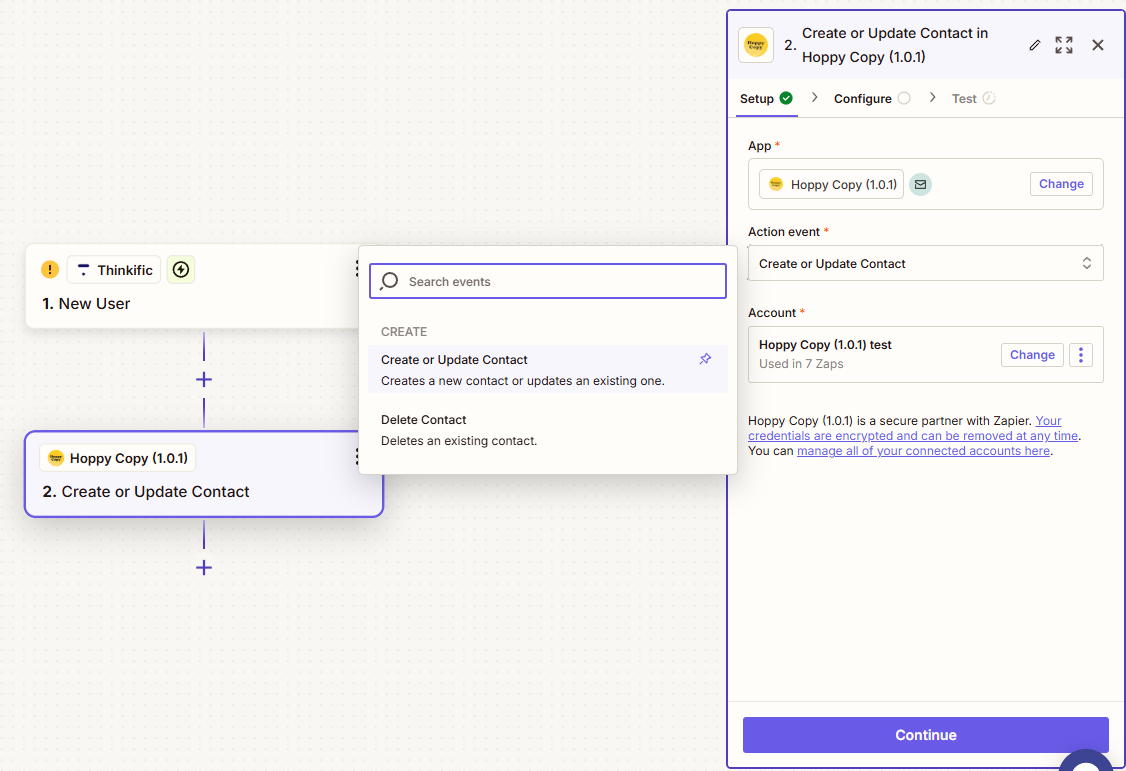
 Step 3. Then, choose 'Hoppy Copy' as the Action, choose 'Create or Update Contact' as the action event and use the generated API key to connect to your Hoppy Copy account:

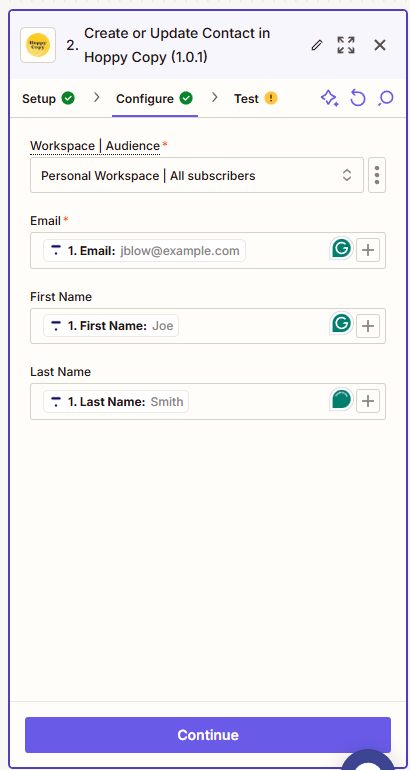
Step 4. Configure the audience fields accordingly:

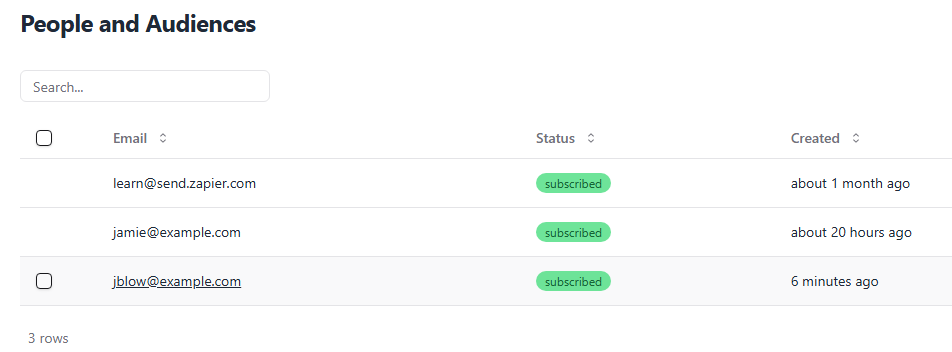
After testing the action event, you should see the new test contact appear in Hoppy Copy.

